Remote IoT platform SSH Raspberry Pi download is a topic that has gained significant attention in recent years. With the rise of IoT (Internet of Things) devices, Raspberry Pi has emerged as one of the most popular platforms for remote management and control. This small yet powerful single-board computer allows users to manage IoT devices, execute commands, and transfer files securely through SSH (Secure Shell). Whether you're a hobbyist, developer, or IT professional, understanding how to set up and utilize a remote IoT platform with Raspberry Pi can open up a world of possibilities.
The demand for remote IoT platforms has grown exponentially as businesses and individuals seek efficient ways to manage their connected devices. Raspberry Pi, with its affordability and versatility, has become a go-to solution for IoT projects. By leveraging SSH, users can securely access their Raspberry Pi from anywhere in the world, making it an ideal tool for managing IoT applications. In this article, we will explore everything you need to know about setting up and downloading a remote IoT platform using SSH on Raspberry Pi.
Throughout this guide, we will cover the basics of IoT platforms, SSH protocols, and Raspberry Pi configurations. Additionally, we will provide step-by-step instructions for downloading and setting up your remote IoT platform, along with tips for optimizing performance and ensuring security. Whether you're new to IoT or an experienced developer, this article will equip you with the knowledge and tools to succeed in your IoT endeavors.
Read also:Lela Sohna Leaked Understanding The Controversy And Its Implications
Table of Contents
Introduction to IoT Platforms
IoT platforms serve as the backbone of any IoT ecosystem, enabling devices to communicate, share data, and perform tasks seamlessly. These platforms provide the infrastructure needed to connect, manage, and analyze data from IoT devices. From smart homes to industrial automation, IoT platforms play a critical role in ensuring the smooth operation of connected devices.
There are various types of IoT platforms available, each catering to specific use cases. Some platforms focus on data analytics, while others prioritize device management or security. When choosing an IoT platform, it's essential to consider factors such as scalability, compatibility, and ease of use. For small-scale projects, Raspberry Pi-based platforms are often the preferred choice due to their flexibility and cost-effectiveness.
Using Raspberry Pi as a remote IoT platform offers numerous advantages. Its compact size, low power consumption, and robust performance make it an ideal candidate for IoT applications. Additionally, Raspberry Pi supports a wide range of programming languages and frameworks, allowing developers to build custom solutions tailored to their needs.
What is SSH?
SSH, or Secure Shell, is a cryptographic network protocol used for secure communication between two devices over an unsecured network. It provides a secure channel for executing commands, transferring files, and managing remote systems. SSH is widely used in IoT applications to ensure the confidentiality and integrity of data transmitted between devices.
One of the key features of SSH is its ability to authenticate users and encrypt data. This ensures that only authorized individuals can access the system, reducing the risk of unauthorized access or data breaches. SSH also supports key-based authentication, which eliminates the need for passwords and enhances security.
For Raspberry Pi users, SSH is an invaluable tool for remote management. By enabling SSH, users can access their Raspberry Pi from any device with an internet connection, making it easy to monitor and control IoT devices from anywhere in the world.
Read also:Is Oh Yeongsu Still Alive Unraveling The Truth About The Beloved Actor
Raspberry Pi Overview
Raspberry Pi is a series of small single-board computers developed by the Raspberry Pi Foundation. Since its launch in 2012, Raspberry Pi has become one of the most popular platforms for DIY projects, educational purposes, and IoT applications. Its affordability, versatility, and ease of use have made it a favorite among hobbyists and professionals alike.
Below is a table summarizing the key specifications of the latest Raspberry Pi models:
| Model | Processor | RAM | Connectivity | Price |
|---|---|---|---|---|
| Raspberry Pi 4 | Quad-core Cortex-A72 | 2GB/4GB/8GB | Wi-Fi 5, Bluetooth 5.0 | $35-$75 |
| Raspberry Pi Zero 2 W | Quad-core Cortex-A53 | 512MB | Wi-Fi 4, Bluetooth 4.2 | $15 |
Raspberry Pi's compatibility with various operating systems, including Raspbian, Ubuntu, and Windows IoT Core, further enhances its appeal. Its GPIO (General Purpose Input/Output) pins allow users to connect sensors, actuators, and other peripherals, making it an ideal platform for IoT projects.
Setting Up SSH on Raspberry Pi
Setting up SSH on Raspberry Pi is a straightforward process. Follow the steps below to enable SSH and configure it for remote access:
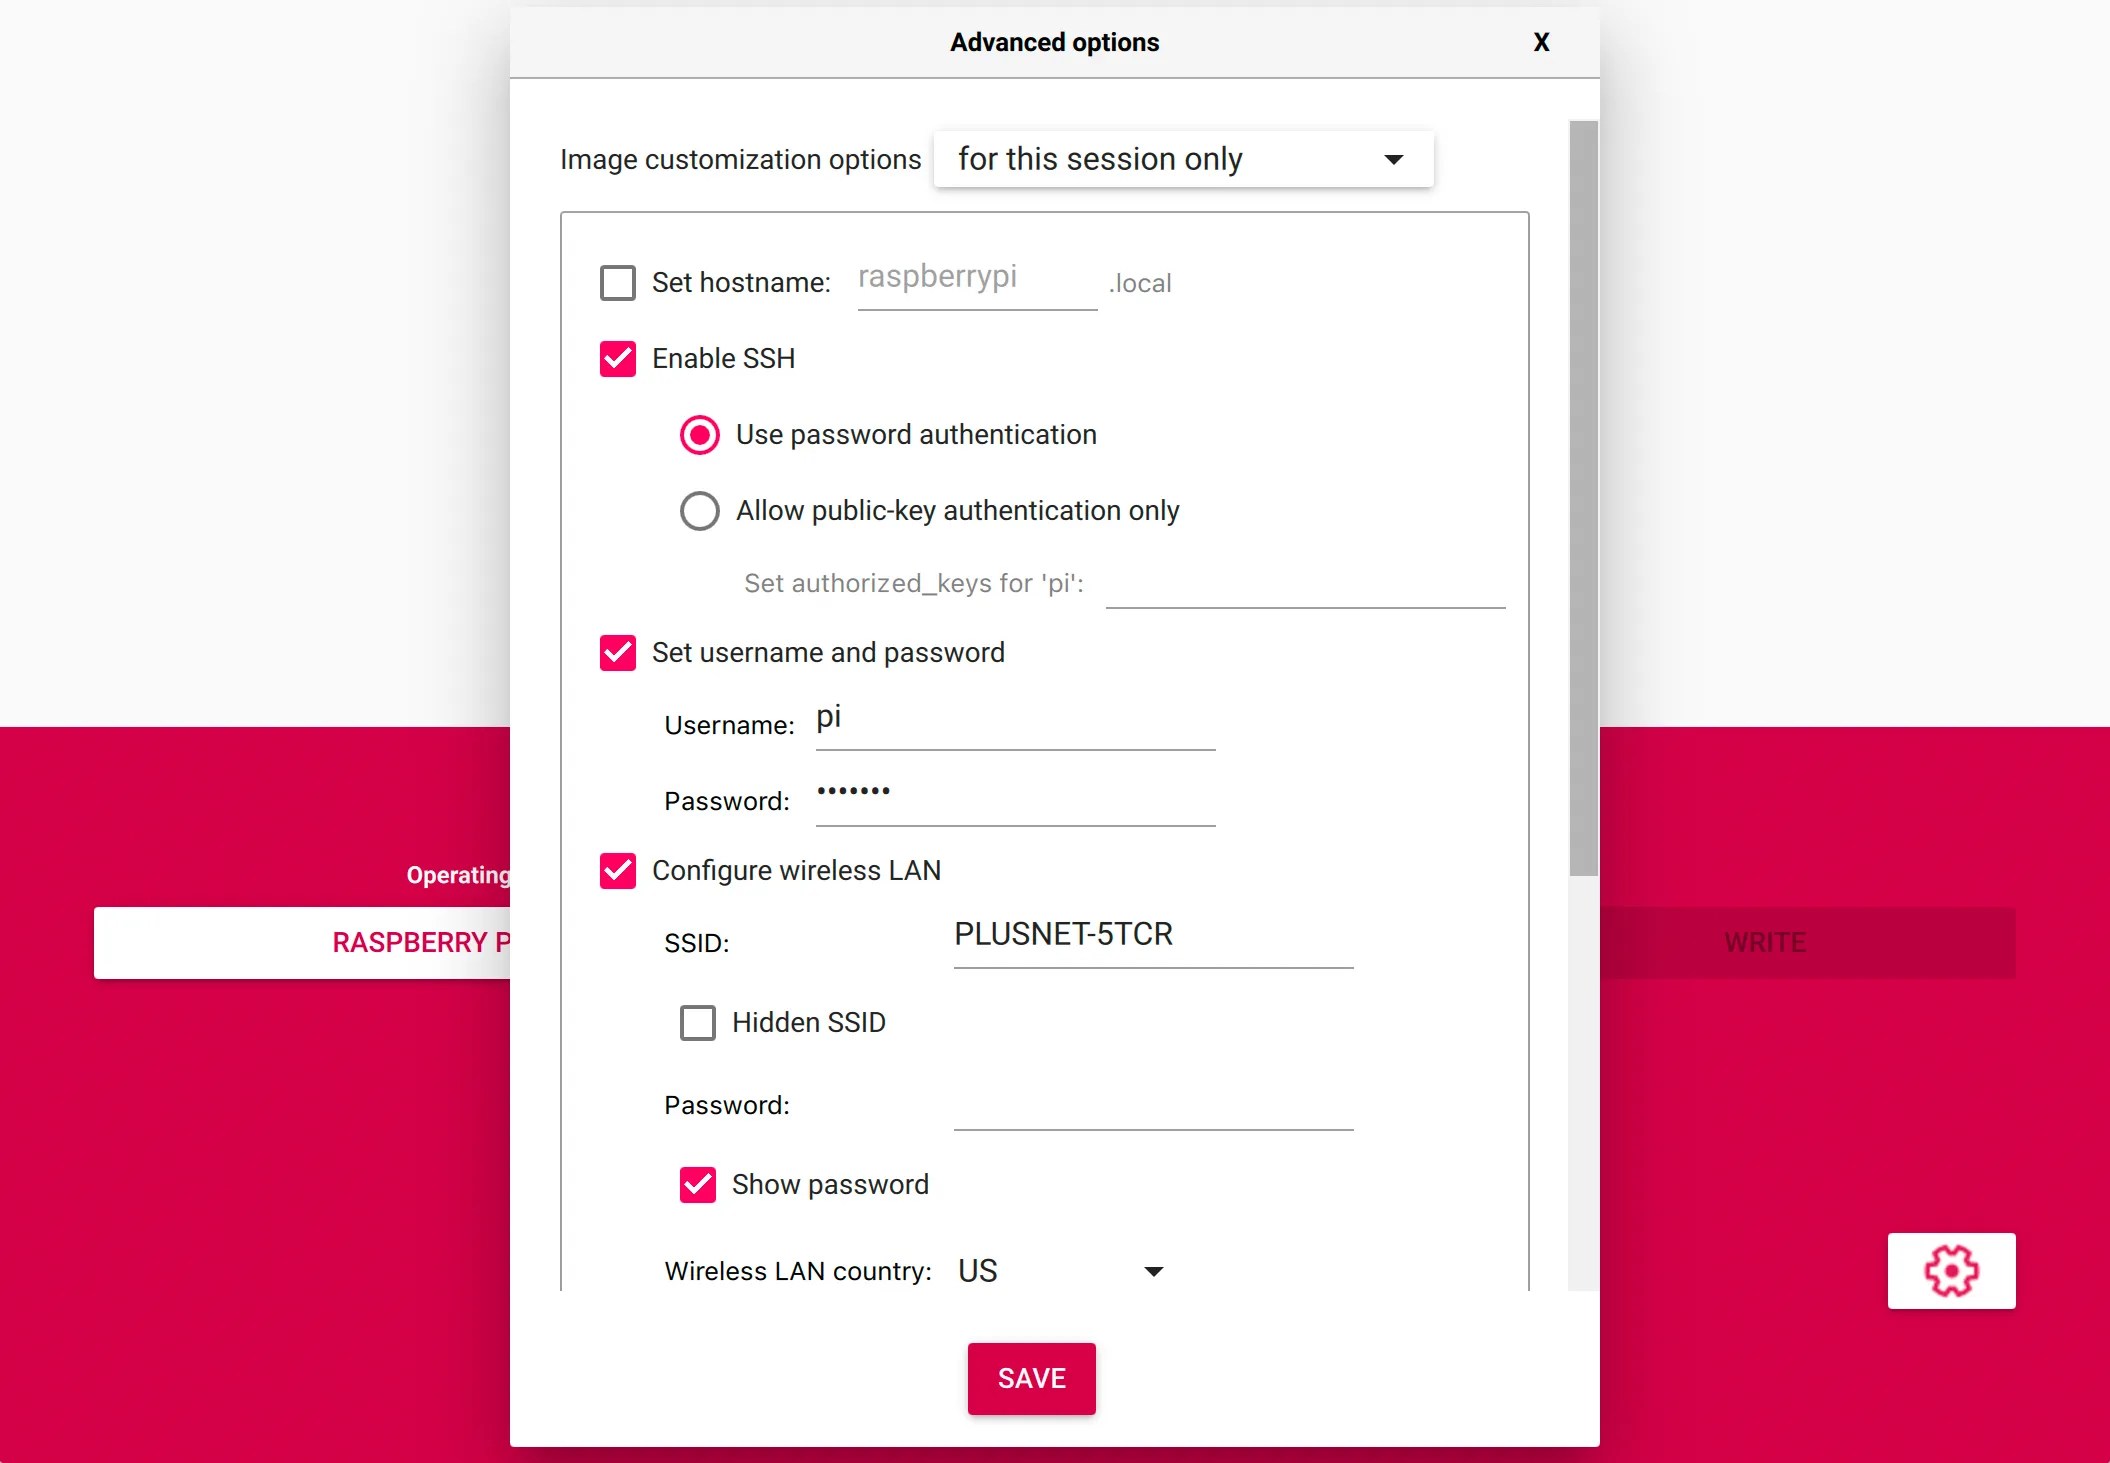
Step 1: Enable SSH
To enable SSH, open the Raspberry Pi configuration menu by typing sudo raspi-config in the terminal. Navigate to "Interfacing Options" and select "SSH." Choose "Yes" to enable SSH and exit the menu.
Step 2: Connect to Your Network
Ensure that your Raspberry Pi is connected to the same network as your remote device. You can check the IP address of your Raspberry Pi by typing hostname -I in the terminal.
Step 3: Access Raspberry Pi via SSH
From your remote device, open a terminal or SSH client and type ssh pi@. Replace
Downloading a Remote IoT Platform
Once SSH is set up, the next step is to download and install a remote IoT platform on your Raspberry Pi. There are several popular IoT platforms available, such as Home Assistant, Node-RED, and ThingsBoard. Below, we'll walk you through the process of downloading and installing one of these platforms.
Option 1: Home Assistant
Home Assistant is an open-source home automation platform that integrates with a wide range of IoT devices. To install Home Assistant, follow these steps:
- Update your Raspberry Pi by running
sudo apt update && sudo apt upgrade. - Download the Home Assistant installer script using
curl -sL https://raw.githubusercontent.com/home-assistant/supervised-installer/master/installer.sh | bash. - Wait for the installation to complete and access Home Assistant via your web browser at
http://.:8123
Option 2: Node-RED
Node-RED is a flow-based development tool for IoT applications. To install Node-RED, run the following commands:
- Install Node.js using
curl -sL https://deb.nodesource.com/setup_16.x | sudo -E bash -. - Install Node-RED with
sudo npm install -g --unsafe-perm node-red. - Start Node-RED by typing
node-red-start.
Configuring Your IoT Platform
After downloading and installing your chosen IoT platform, the next step is to configure it for your specific use case. This involves adding devices, setting up automation rules, and customizing the user interface.
For Home Assistant, you can add devices by navigating to the "Integrations" section and searching for compatible devices. Node-RED, on the other hand, allows you to create custom workflows by dragging and dropping nodes onto the canvas.
Regardless of the platform you choose, it's essential to test your configuration thoroughly to ensure that all devices are functioning as expected. Additionally, consider setting up backups to prevent data loss in case of system failure.
Security Best Practices
Security is a critical consideration when setting up a remote IoT platform. Below are some best practices to enhance the security of your Raspberry Pi and IoT devices:
- Change the default password for your Raspberry Pi user account.
- Use key-based authentication instead of passwords for SSH access.
- Regularly update your operating system and IoT platform to patch vulnerabilities.
- Enable a firewall to restrict access to your Raspberry Pi.
- Monitor your network for suspicious activity using tools like Fail2Ban.
Troubleshooting Common Issues
While setting up a remote IoT platform, you may encounter some common issues. Below are troubleshooting tips for resolving these problems:
Issue: Unable to Connect via SSH
If you're unable to connect to your Raspberry Pi via SSH, ensure that SSH is enabled and that your Raspberry Pi is connected to the network. Double-check the IP address and try restarting the SSH service using sudo service ssh restart.
Issue: Slow Performance
If your Raspberry Pi is running slowly, consider upgrading to a model with more RAM or using a lightweight operating system like Raspbian Lite. Additionally, close unnecessary applications and services to free up resources.
Use Cases and Applications
Remote IoT platforms powered by Raspberry Pi have a wide range of applications across various industries. Some common use cases include:
- Smart home automation for controlling lights, thermostats, and security systems.
- Industrial IoT for monitoring equipment and optimizing production processes.
- Environmental monitoring for tracking temperature, humidity, and air quality.
- Healthcare IoT for remote patient monitoring and telemedicine.
Conclusion
In conclusion, setting up a remote IoT platform SSH Raspberry Pi download is a powerful way to manage and control IoT devices from anywhere in the world. By leveraging the capabilities of Raspberry Pi and SSH, users can build secure, scalable, and efficient IoT solutions tailored to their needs.
We hope this guide has provided you with the knowledge and tools to successfully set up and configure your remote IoT platform. If you have any questions or need further assistance, feel free to leave a comment below. Don't forget to share this article with others who may find it helpful and explore more content on our website for additional insights into IoT and Raspberry Pi projects.